✨Welcome to ZooDesk
ZooDesk is a web application for managing an animal collection – from individual animals to enclosures, breeding and the annual inventory. This guide walks you through installation and your first steps, and answers common questions.
Animal types & animals
Stock per animal type with sex, date of birth, tag/chip, photo and status (alive, deceased, transferred, fed).
Health
Weight history with chart, treatments by category, notes and documents (e.g. vet reports as PDF).
Pedigree & breeding
Pedigree, record offspring, pairing suggestions and automatic inbreeding check.
Enclosures
Enclosures with area, photo, description and technical notes; assign animal types.
Event timer
Breeding, health and husbandry events with due dates; due events are flagged on the home page.
Inventory
Annual inventory per animal type, total inventory, chronological inventory with CSV export and print views.
Users & permissions
Four default groups, custom groups and fine-grained permissions; activity log.
German & English
Choose the language during installation and switch at any time in the settings.
Backups
Create, restore and delete database backups with one click.
🧰Requirements
- Web server with PHP 7.4 or higher (e.g. Apache); PHP 8.x is recommended.
- MySQL database (or compatible, e.g. MariaDB) and a database user allowed to create tables.
- Write permissions for the folders
uploads/,documents/,enclosure_photos/andbackups/. - Recommended: HTTPS (SSL certificate) – used among other things for the links in “forgot password” emails.
- For “forgot password”: an SMTP mailbox or a working PHP
mail()function. - A current browser (e.g. Chrome, Firefox, Edge, Safari).
🚀Installation
Upload the files
Upload all files and folders of ZooDesk to a directory on your web server (e.g.
/var/www/zooorpublic_html/zoo). Make sure the hidden.htaccessfiles inside the sub-folders are uploaded too.Edit config.php
Open
config.phpand enter your database credentials:$db_host = 'localhost'; // Your database host $db_user = 'dein_benutzer'; // Your database user name $db_pass = 'dein_passwort'; // Your database password $db_name = 'datenbank_name'; // Database nameOptionally (for “forgot password”) the SMTP settings in the same file:
define('SMTP_HOST', 'smtp.dein-provider.de'); define('SMTP_PORT', 587); define('SMTP_USER', 'noreply@deine-domain.de'); define('SMTP_PASS', 'dein-smtp-passwort'); define('SMTP_ENCRYPTION', 'tls'); // 'tls', 'ssl' or '' define('MAIL_FROM', 'noreply@deine-domain.de'); define('MAIL_FROM_NAME', 'ZooDesk');💡If
SMTP_HOSTstays at the placeholdersmtp.dein-provider.de, ZooDesk sends emails via the server’s PHPmail()function.Make sure the web server can write to
uploads/,documents/,enclosure_photos/andbackups/(e.g.chmod 775 uploads).Run the installer and choose the language
Open
install.phpin your browser (e.g.https://yourserver.com/zoo/install.php). Choose the language (Deutsch or English) at the very top – the installer switches immediately and ZooDesk is set up in that language, including sample data such as event types and treatment categories.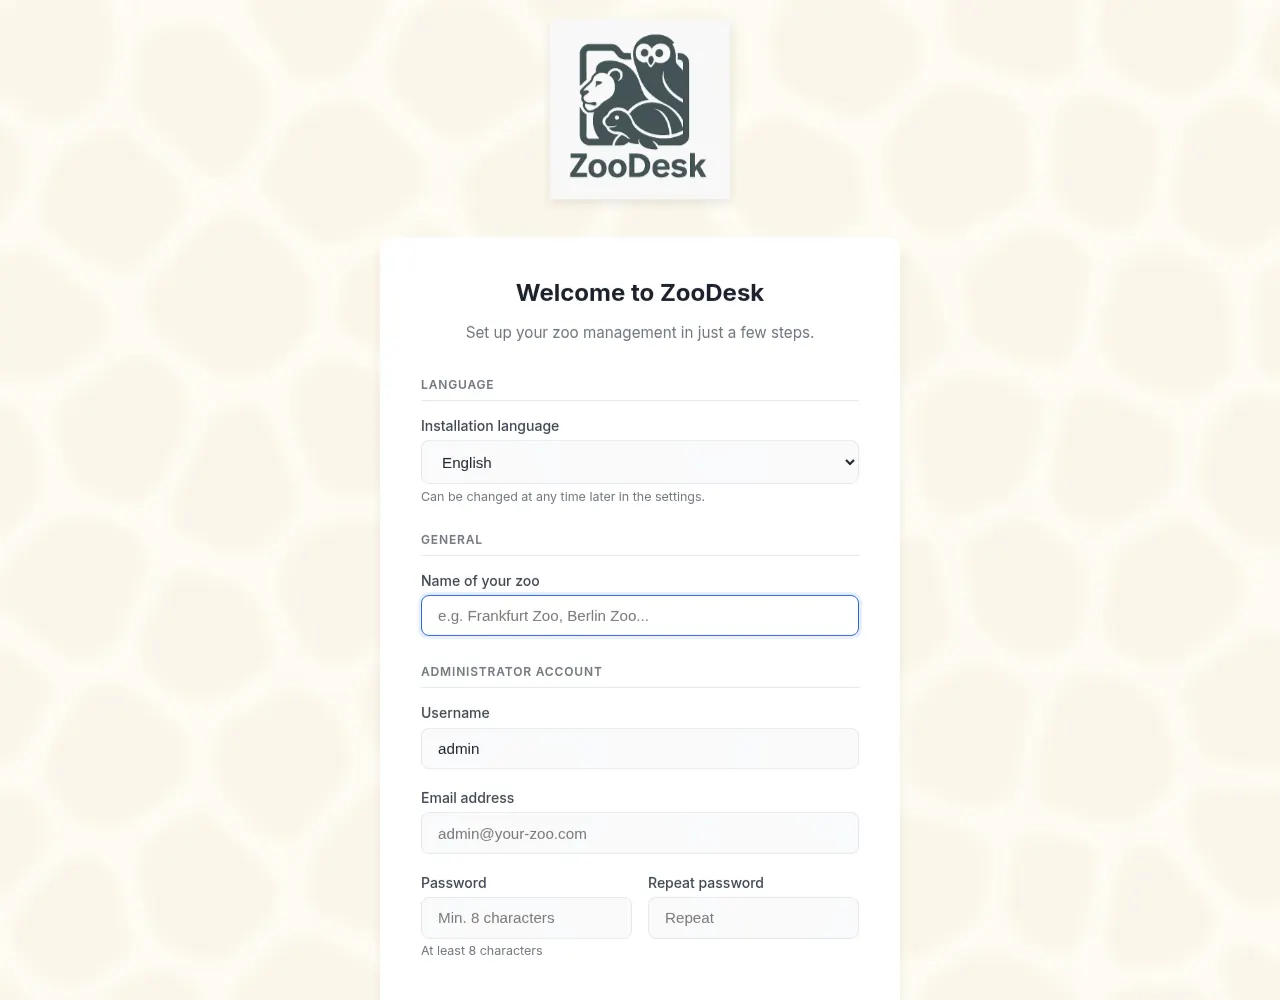
The installer with language selection Set the site name and accounts
- Site name, e.g. “Sunnyvale Zoo” (max. 100 characters).
- Admin account and reader account: user name (max. 50 characters), email address and password for each. The two user names must differ.
- Passwords: at least 8 characters, at least one uppercase letter and one special character.
Click “Start installation”. The installer creates all tables (settings, users, groups/permissions, animal types, animals, notes, weights, treatments, documents, enclosures, events …), creates your two accounts and adds test data (animal types Zebra and Elephant with three animals each).
Delete install.php
🔒Delete
install.phpafter the installation so nobody can run the installer again.There are no default credentials – you set them yourself in the installer. Keep them safe, especially for the
adminaccount: this user cannot be deleted.
👣First steps
After installation, this tour helps you get ZooDesk up and running in a few minutes. The screenshots are taken from a demo installation with sample data.
Log in
Open
login.php(e.g.https://yourserver.com/zoo/login.php) and sign in with your admin account. After 5 failed attempts, login is locked for 15 minutes; inactive sessions end after 2 hours.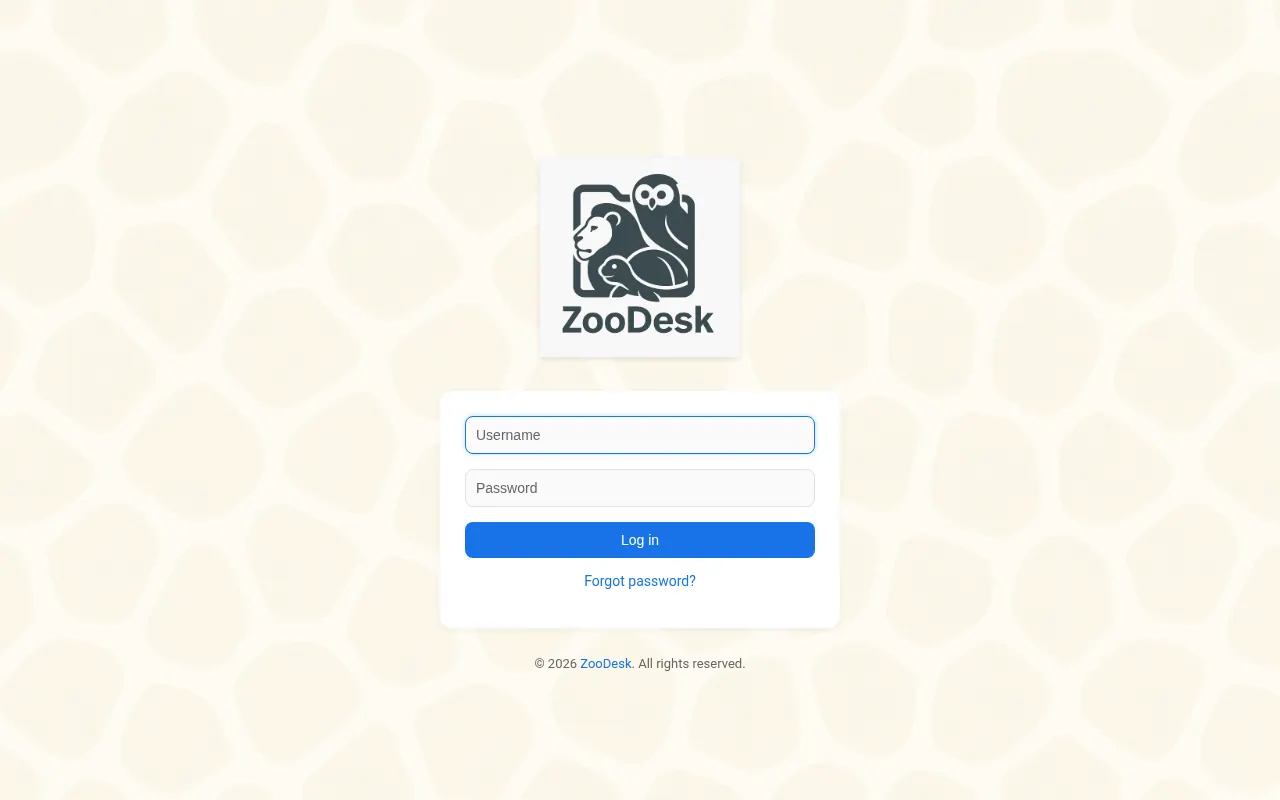
The login page Settings & language
Under Settings → General settings you change the site name, the language (applies to all users) and the animal type view (alphabetical or by enclosure), and manage backups.
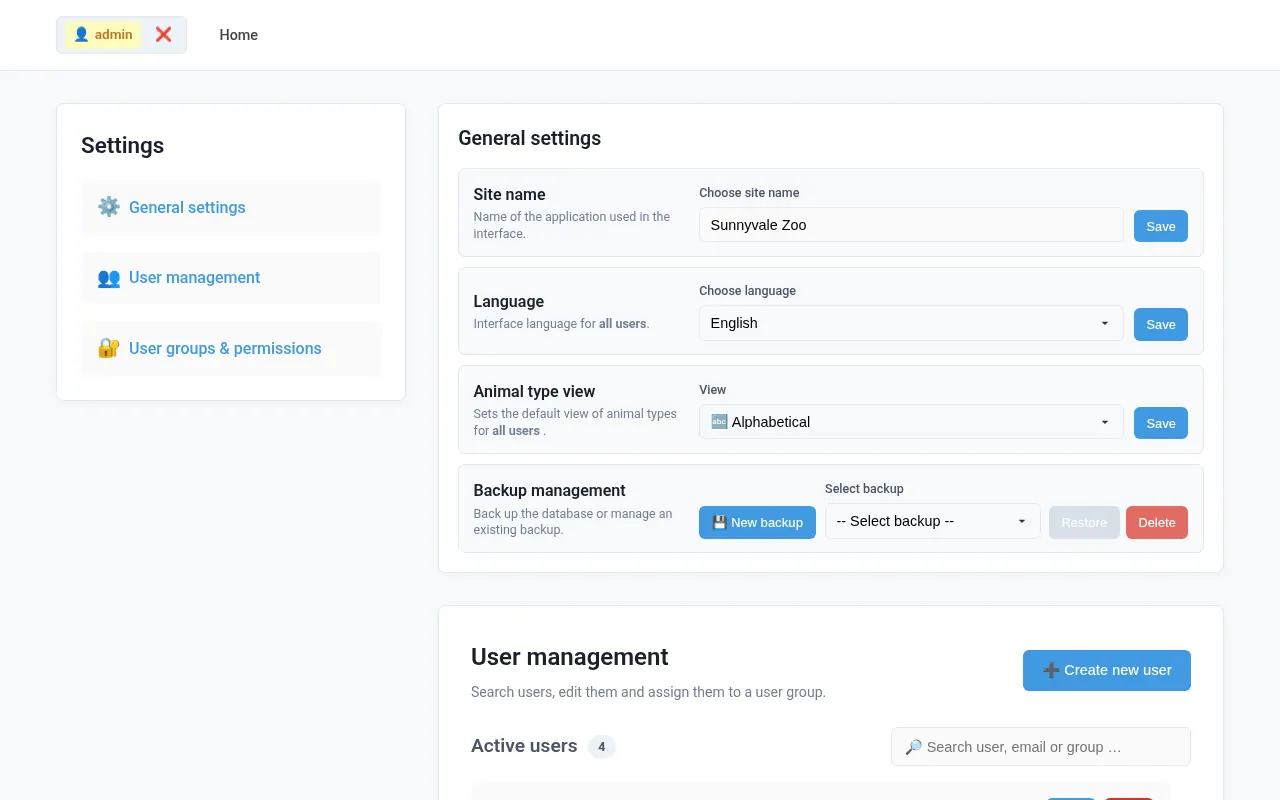
General settings with language selection Create an animal type
On the home page, click New animal type under Actions. The icons next to an animal type let you edit it, open its inventory or delete it. The search for animal types or animal names is at the top right.
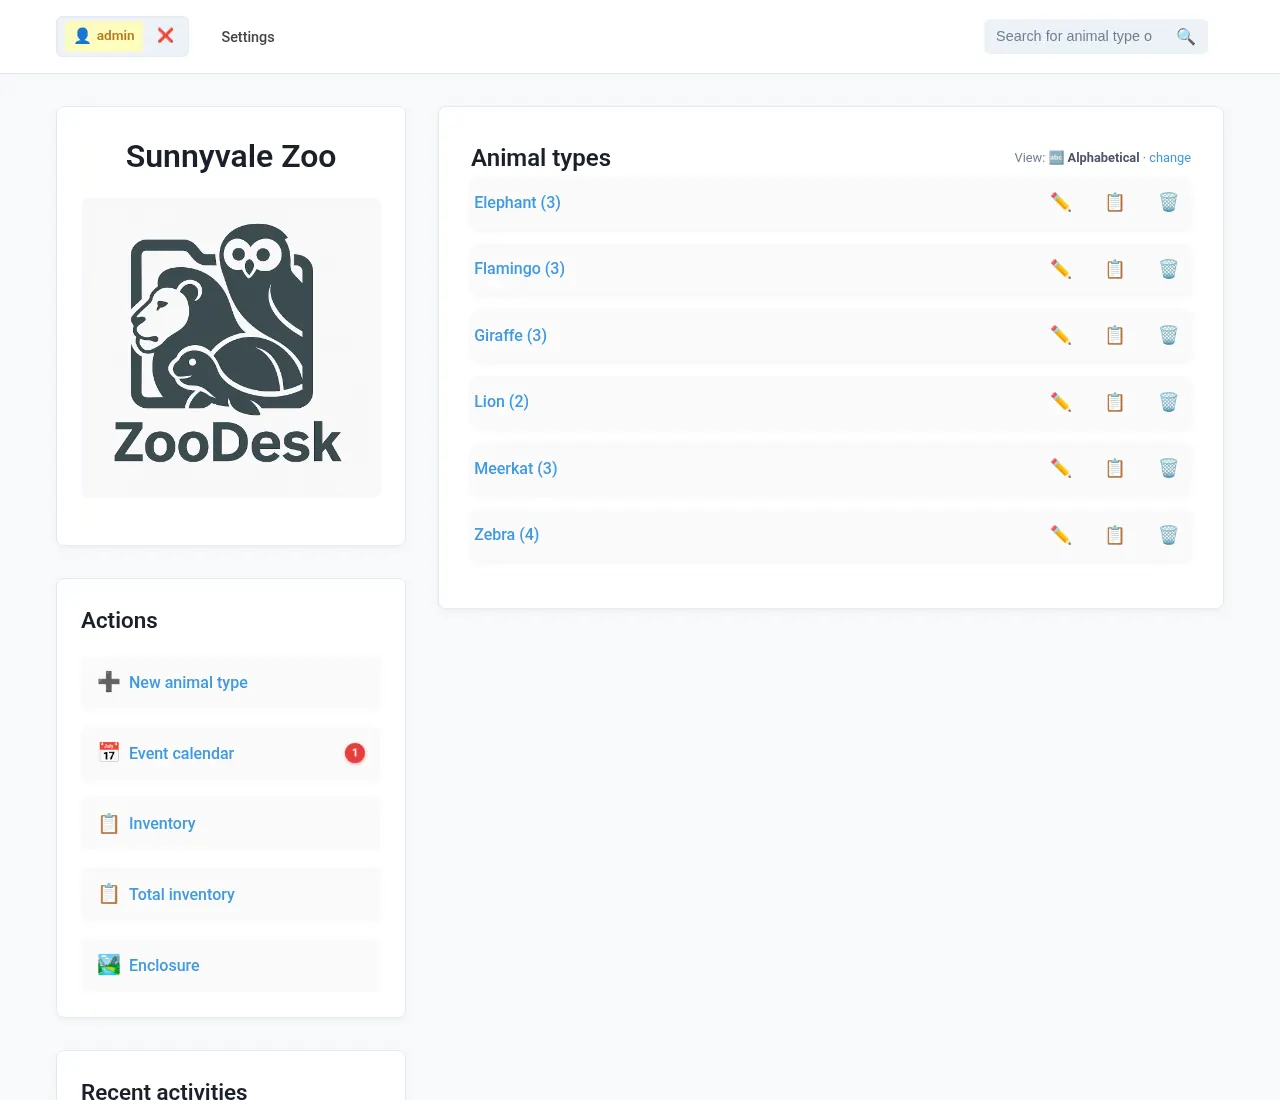
Home page with animal types, actions and recent activity Add animals
Open an animal type and choose Add animal. The list can be sorted by name, date of birth or sex. With bulk actions you can mark several animals as deceased, transferred or fed, or delete them. Deceased, transferred and fed animals remain available in their own lists below.
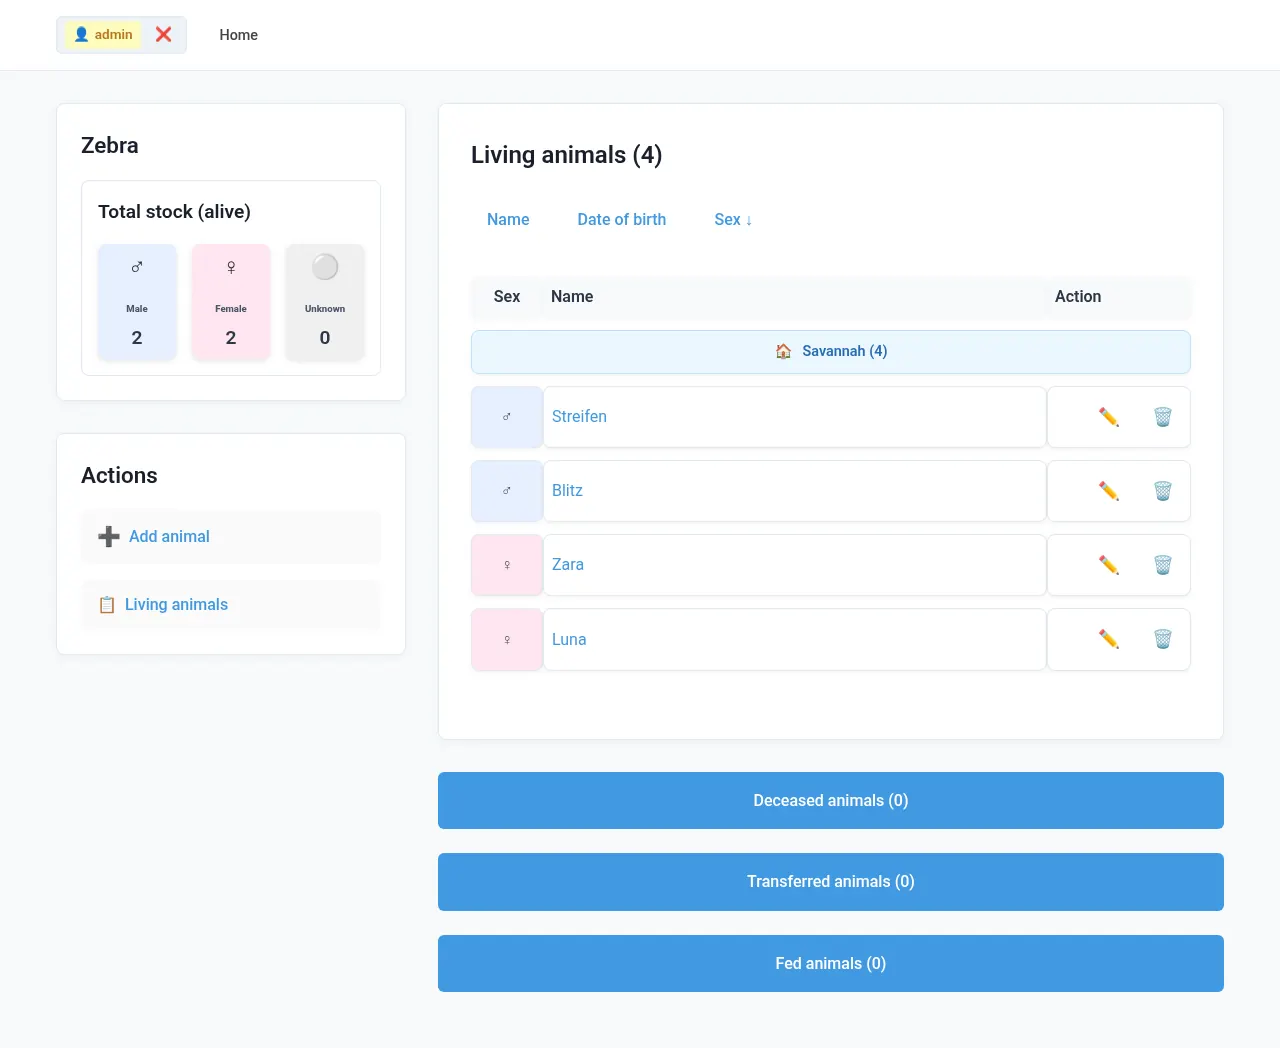
Animal type with living animals, grouped by enclosure Animal profile
Clicking an animal opens its profile with photo, tag/chip, date of birth, sex, status, last weight, offspring and notes. Use Edit to change the master data and status.
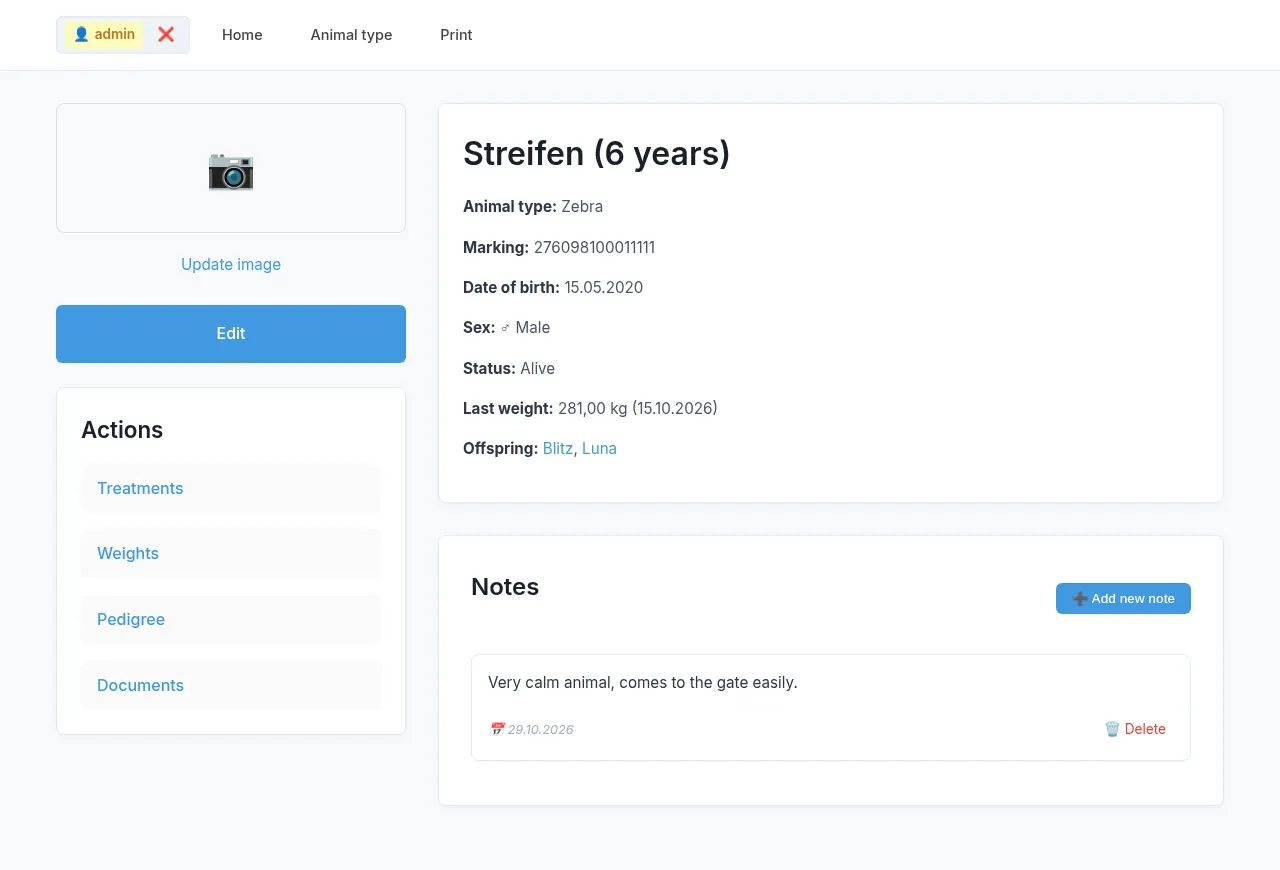
Animal profile with notes Weights, treatments & documents
In the profile under Actions: Weights shows the history as a chart, treatments are organised in categories (e.g. dewormings, vaccinations) that apply to the whole animal type, and under Documents you upload files (PDF, images, Word, Excel, TXT, CSV; max. 50 MB).
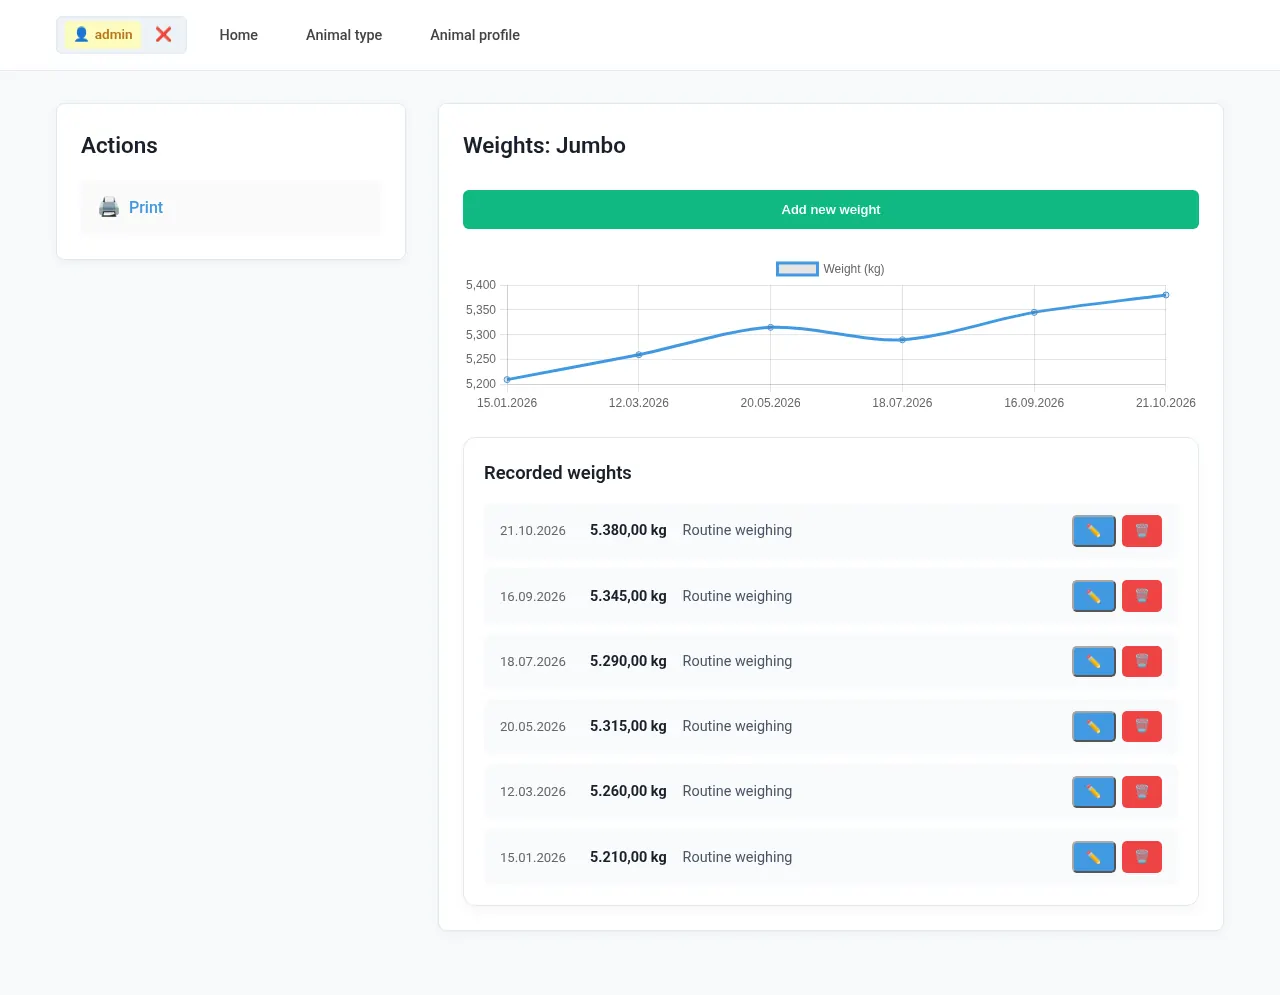
Weight history 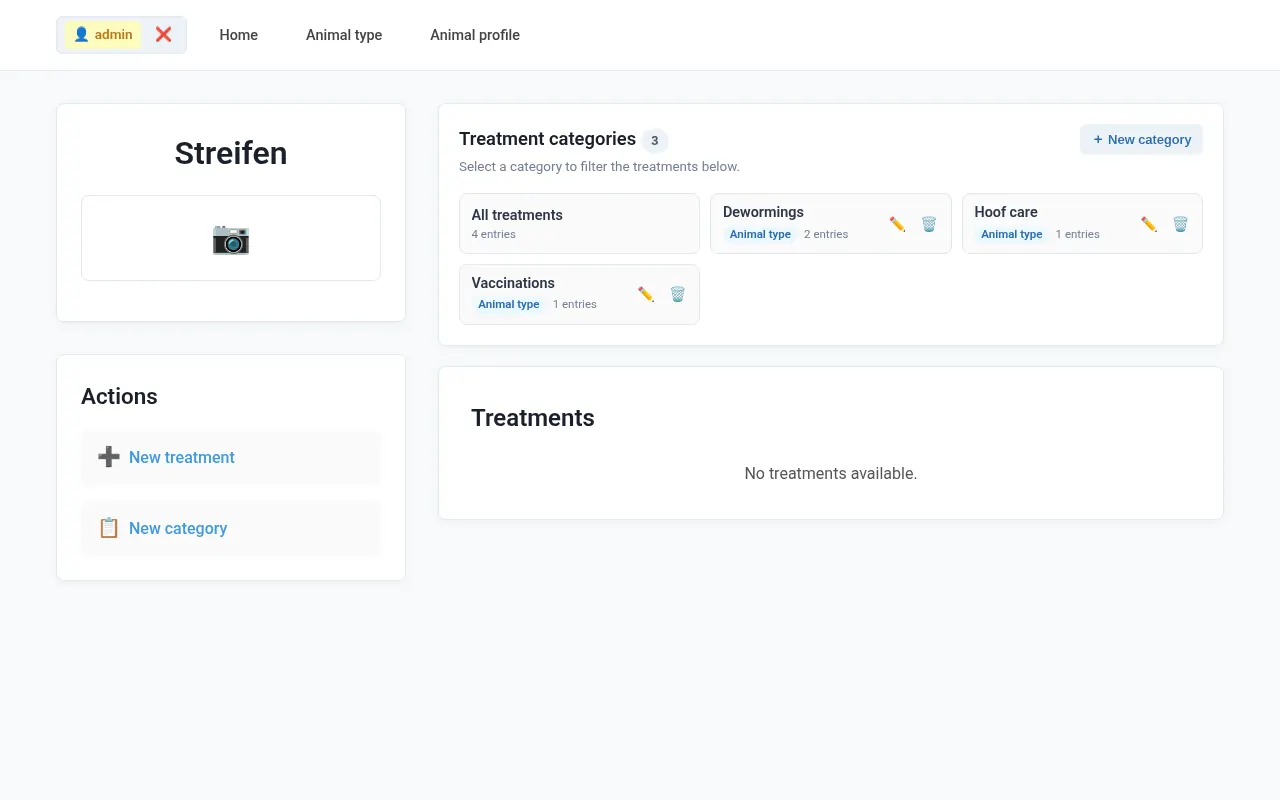
Treatments by category Manage enclosures
Via Enclosures on the home page you create enclosures with area, description, photo and technical notes and assign animals or animal types. If you set the view to “By enclosure” in the settings, the home page is grouped accordingly.
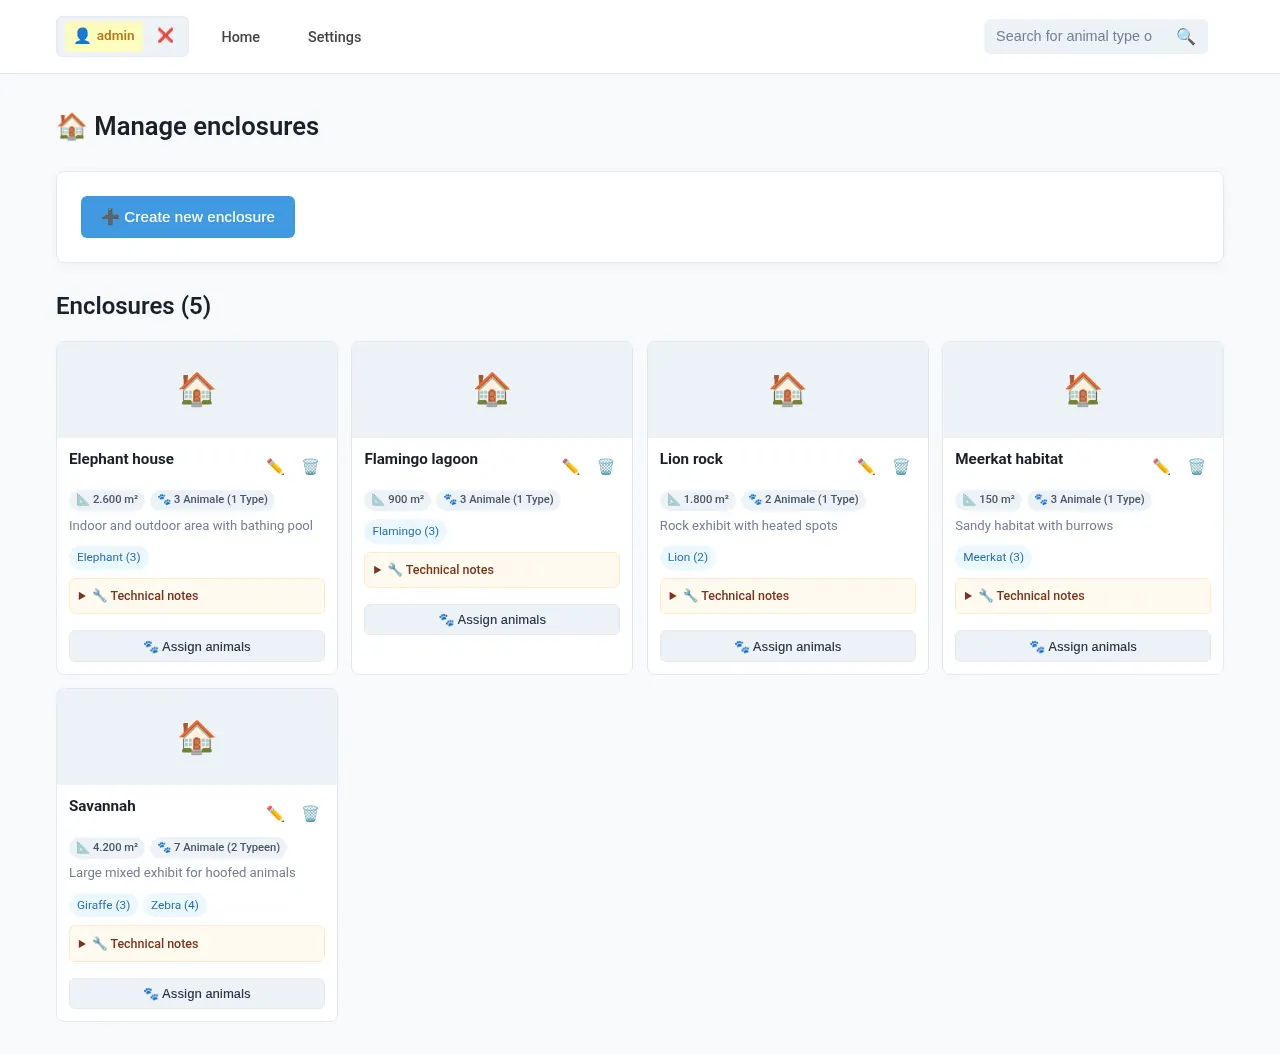
Enclosure overview Pedigree & inbreeding check
In the animal profile, Pedigree shows the animal’s ancestry. There you can add offspring, view pairing suggestions and save the pedigree. When you pick father and mother, ZooDesk automatically checks for inbreeding and blocks saving until you explicitly allow it.
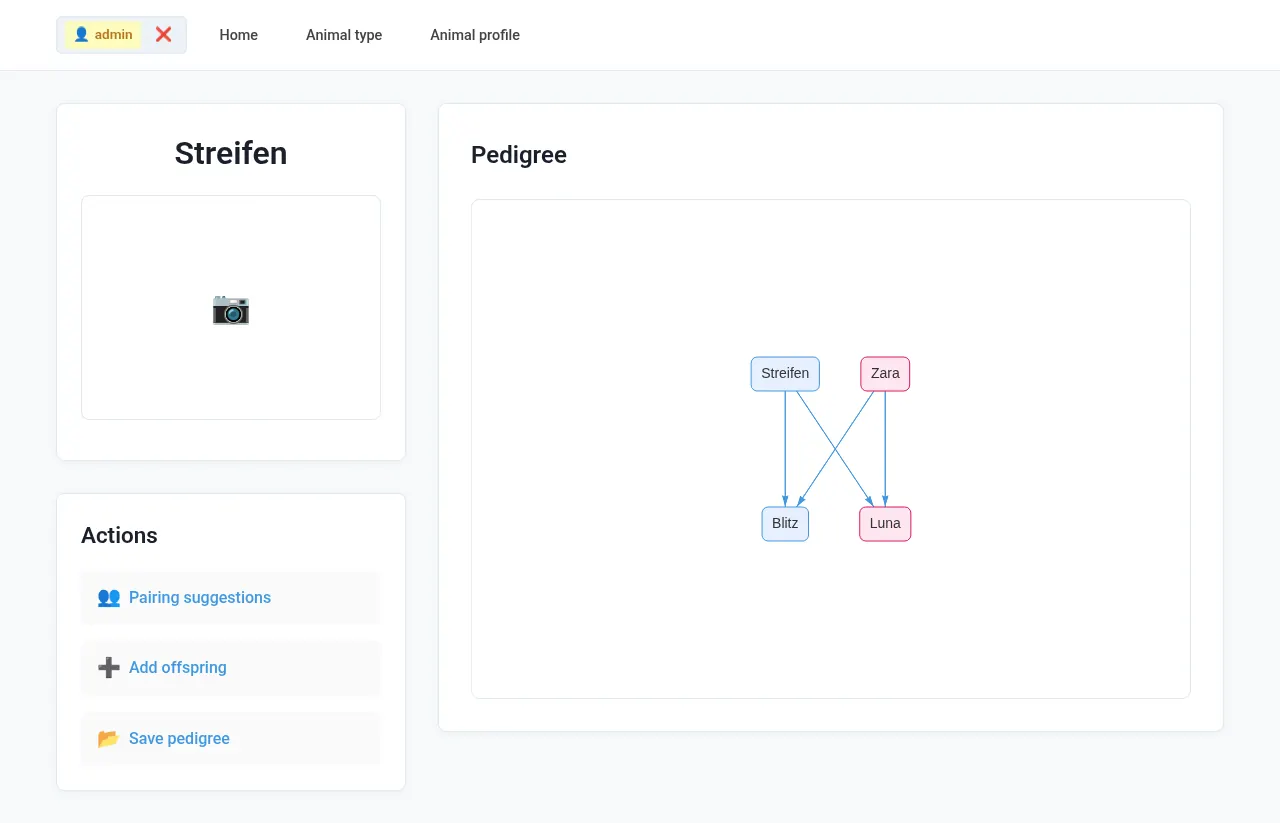
Pedigree with parents and offspring Plan events
The Event calendar manages dates such as mating, pregnancy, quarantine or hibernation – for single animals or a whole animal type – with a reminder period. Due events are highlighted in red and counted on the home page. You can create your own event types.
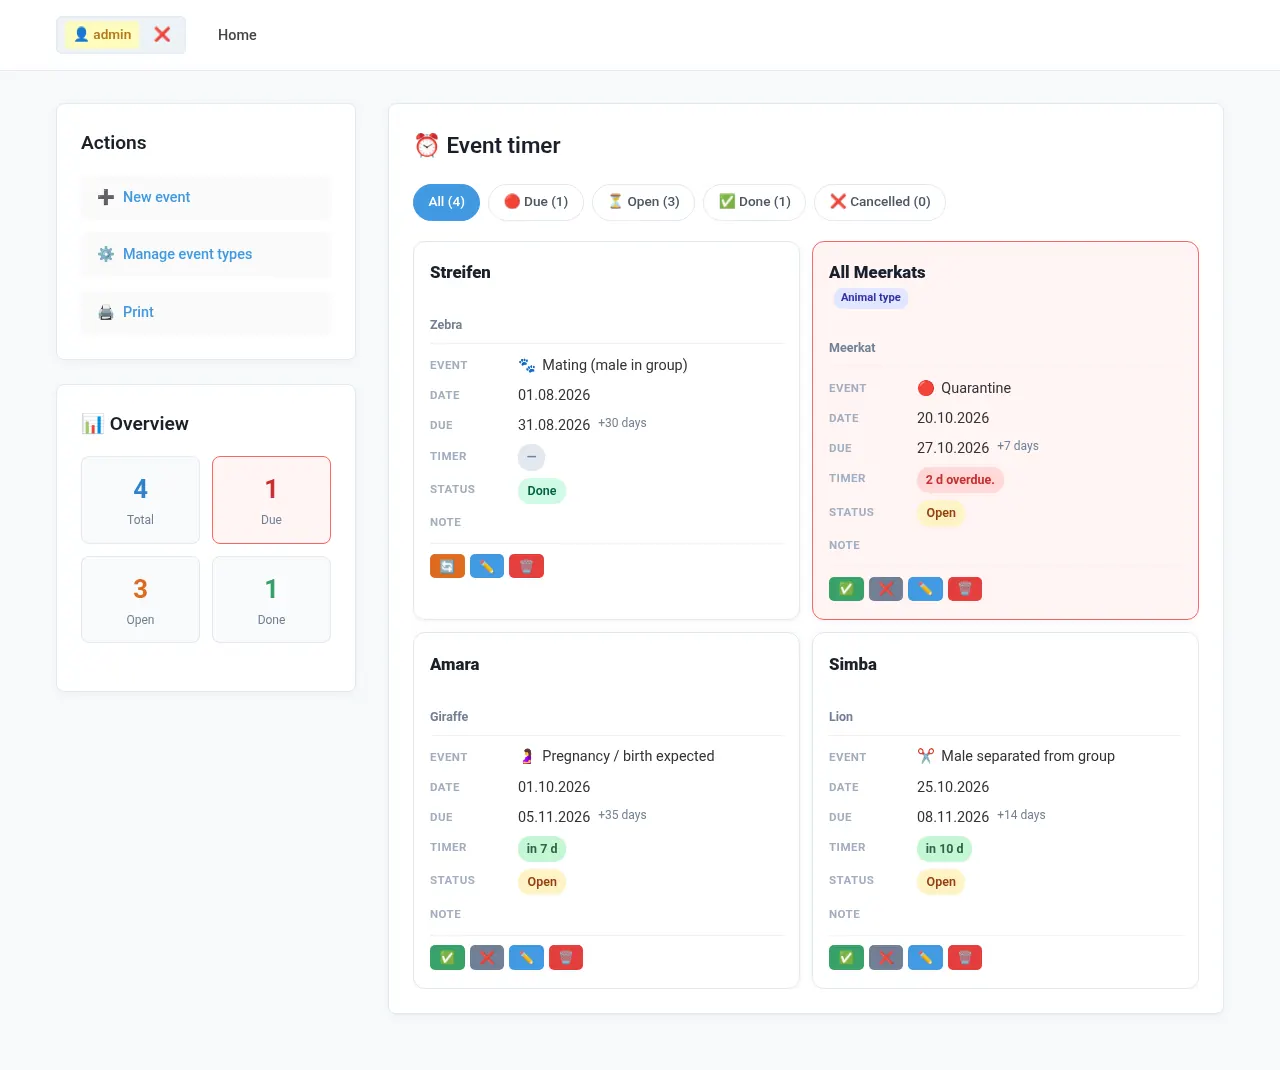
Event timer with filters and overview Inventory, printing & CSV
Inventory shows the opening stock, arrivals, births, departures and the current stock by sex for each animal type and year. The Total inventory combines all animal types, the chronological inventory lists every movement and offers a CSV download. Most pages have their own print view.
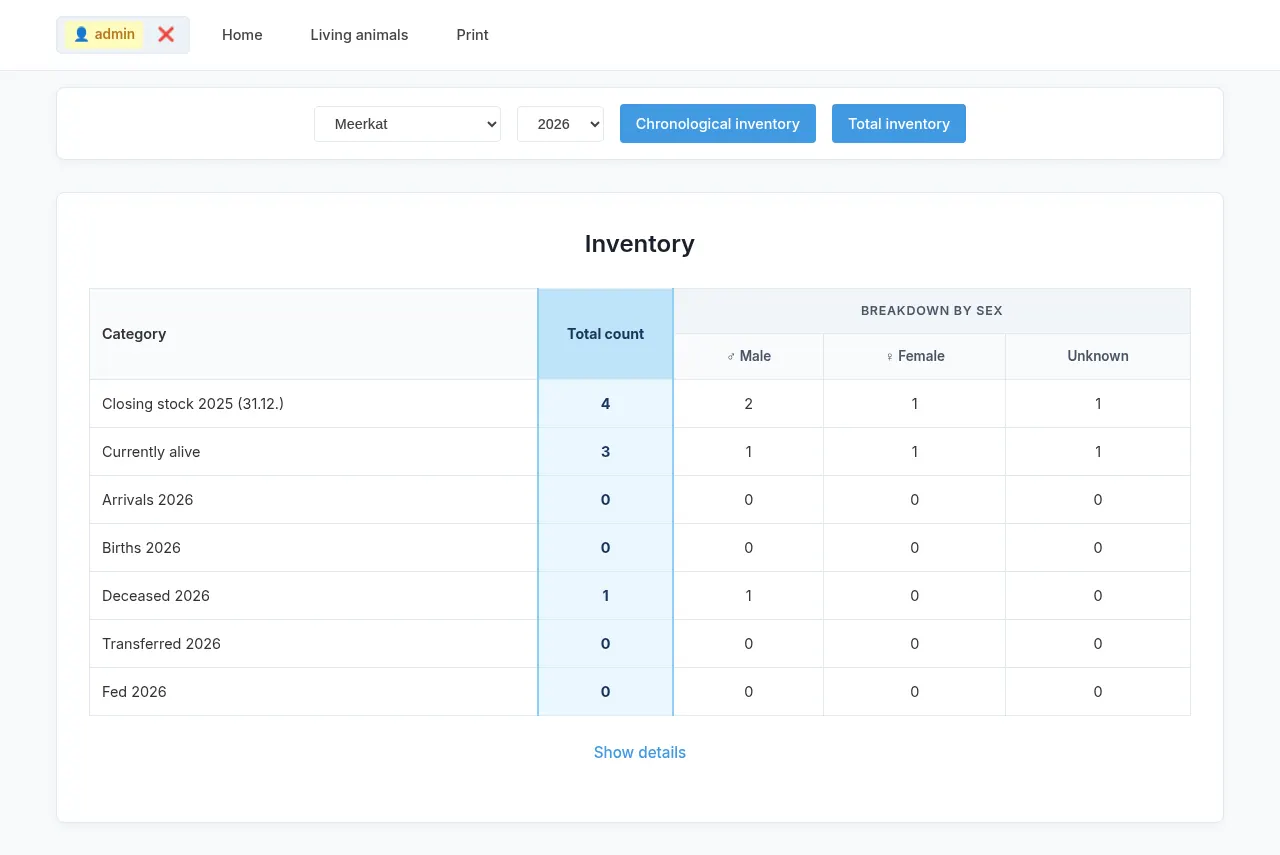
Annual inventory of an animal type Users & groups
Under Settings → User management you create accounts for your colleagues and assign them to a group. Under User groups & permissions you adjust group permissions or create your own groups (see User groups & permissions).
Create a backup
Click New backup under Settings → Backup management. Do this regularly and before every update (see Backups).
👥User groups & permissions
ZooDesk ships with four default groups. The installer creates one admin and one reader account; you assign further users to a group under Settings. The default permissions at a glance:
| Permission | Admins | Team lead | Keeper | Reader |
|---|---|---|---|---|
| Add / edit animals | ✓ | ✓ | ✓ | – |
| Delete animals | ✓ | ✓ | – | – |
| Notes, documents, weights, treatments | ✓ | ✓ | ✓ | – |
| Breeding / offspring | ✓ | ✓ | ✓ | – |
| Manage animal types, enclosures, events | ✓ | ✓ | – | – |
| Users, groups & permissions | ✓ | – | – | – |
| Site settings, backups, activity logs | ✓ | – | – | – |
| View everything | ✓ | ✓ | ✓ | ✓ |
The permissions of each group can be adjusted individually under Settings → User groups & permissions, and you can create your own groups. The Admins group always has all permissions; the last administrator cannot be deleted.
🌐Changing the language
The interface language (Deutsch or English) can be changed at any time under Settings → General settings → Language. The setting applies to all users and is stored in the database – emails, print views and CSV exports also use the selected language.
The texts live in the lang/ folder: lang/en.php contains the English translations. Data you have already entered (e.g. animal type or event type names) is not translated when switching.
💾Backups
Under Settings → Backup management, New backup creates a full database backup as an SQL file in the backups/ folder. Use the drop-down list to restore or delete a backup.
The backup only contains the database. Back up animal photos (uploads/), documents (documents/) and enclosure photos (enclosure_photos/) separately via FTP or your hosting panel. Restoring overwrites the current database state.
🔒Security
- Delete
install.phpas soon as the installation is complete. - Use HTTPS. ZooDesk detects HTTPS (also behind reverse proxies) and then sets secure cookies and HSTS.
- Keep the
.htaccessfiles:backups/is fully blocked, and executing PHP files is prevented inuploads/,documents/andenclosure_photos/. On nginx you need to add equivalent rules yourself. - Use strong passwords and grant permissions on a “least privilege” basis.
- Create backups regularly and keep copies off the server.
Built in: CSRF protection for all forms, lockout after failed logins, upload checks by type and size, and security headers (e.g. X-Frame-Options).
❓Frequently asked questions (FAQ)
How do I reset a forgotten password?
Click “Forgot password?” on the login page and enter your user name or email. ZooDesk sends a link that is valid for 1 hour. This requires working email delivery (SMTP in config.php or PHP mail()). The link is always generated with https://, so ZooDesk should be reachable via HTTPS. Alternatively, an admin can set a new password under Settings → User management.
No email arrives – what can I do?
Check the SMTP settings in config.php (host, port, user, password, encryption tls/ssl) and that MAIL_FROM matches your mailbox. Also look in the spam folder and in the PHP error log (“SMTP-Verbindung fehlgeschlagen”). For security reasons the page always shows the same message, even if the user does not exist. After 3 requests the feature is locked for 15 minutes.
Can each user choose their own language?
No. The language is a global setting under Settings → General settings and applies to all users. Users with the “Change site settings” permission can change it.
A user cannot see certain buttons.
Buttons only appear if the user’s group has the matching permission. Readers can see all data but cannot change anything. Adjust the permissions under Settings → User groups & permissions or assign the user to another group.
I cannot upload photos or documents.
Usually write permissions are missing: the web server must be able to write to uploads/, documents/ and enclosure_photos/ (e.g. chmod 775, owner = web server user). Limits: animal photos max. 10 MB (JPG, PNG, WebP, GIF), enclosure photos max. 5 MB, documents max. 50 MB. Also check your PHP upload_max_filesize and post_max_size.
How do I restore a backup?
Select the backup in the list under Settings → Backup management and click Restore. Note: the current database state is replaced. If in doubt, create a new backup first.
How do I move to a new server?
1. Create a new backup. 2. Copy all files including backups/, uploads/, documents/ and enclosure_photos/ to the new server. 3. Create an empty database there and import the SQL backup, e.g. with phpMyAdmin. 4. Update the credentials in config.php. install.php is not needed for this.
Which PHP version should I use?
At least PHP 7.4; a current PHP 8 version is recommended. On PHP 8.4 and newer, a “Deprecated” notice about fputcsv() may appear in the CSV export if display_errors is on – it is only a notice. Turn display_errors off on production systems.
I am locked out (“too many attempts”).
After 5 failed logins, the combination of IP address and user name is locked for 15 minutes. Wait and try again, or reset the password.
Can I delete the test data?
Yes. The animal types Zebra and Elephant are only examples and can be deleted on the home page with the bin icon.
What do the statuses “transferred” and “fed” mean?
Besides “alive” and “deceased”, an animal can be marked as transferred (e.g. to another zoo) or fed (feeder animals). These animals no longer count towards the stock but remain in their own lists and in the inventory.
🛠️Troubleshooting
| Problem | Solution |
|---|---|
| “Datenbankverbindung fehlgeschlagen” (database connection failed) | Check the database settings in config.php (host, user, password, database name). Some hosts do not use localhost. |
| Blank page / error 500 | Check the server’s PHP error log; verify the PHP version and extensions (mysqli, mbstring, fileinfo). |
| Upload fails | Check write permissions for uploads/, documents/, enclosure_photos/ and backups/, plus file size and type. |
| Backup cannot be created | Check write permissions for backups/. |
| Constantly logged out | Sessions end after 2 hours of inactivity. With HTTPS behind a proxy, the X-Forwarded-Proto header must be set correctly; allow cookies in the browser. |
| Test data missing | Run install.php again (empty the database first). |
| Interface in the wrong language | Switch the language under Settings → General settings; make sure the lang/ folder was uploaded completely. |
🗂️Folder structure
The readme_assets/ folder as well as readme.html and readme_en.html are not needed to run ZooDesk and do not have to be uploaded to the server.